
17 Dec
2013
Hey guys,
Quick video of the beauty in action. Nothing special, just a quick test up/down a street on a cold and frosty morning.
Hey guys,
Quick video of the beauty in action. Nothing special, just a quick test up/down a street on a cold and frosty morning.
Hey Everyone!
I’ve been getting loads of great feedback about this build, glad you’re all enjoying it! I certainly am ;)
Ok, build part 2…
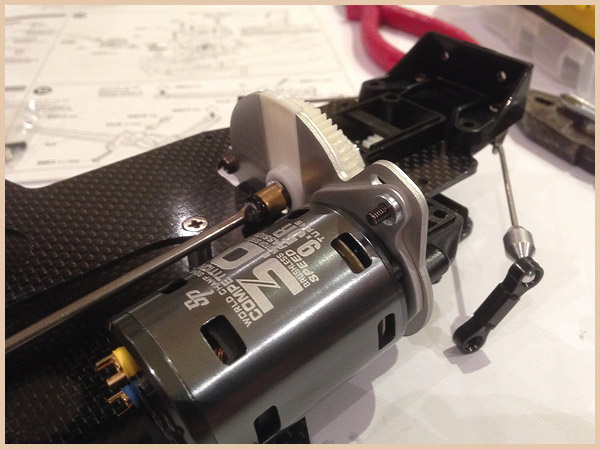
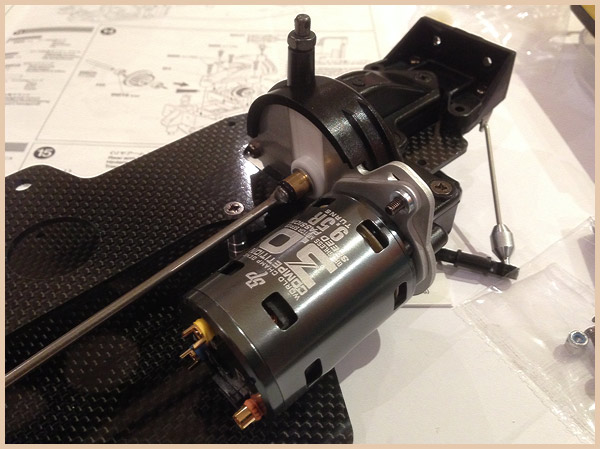
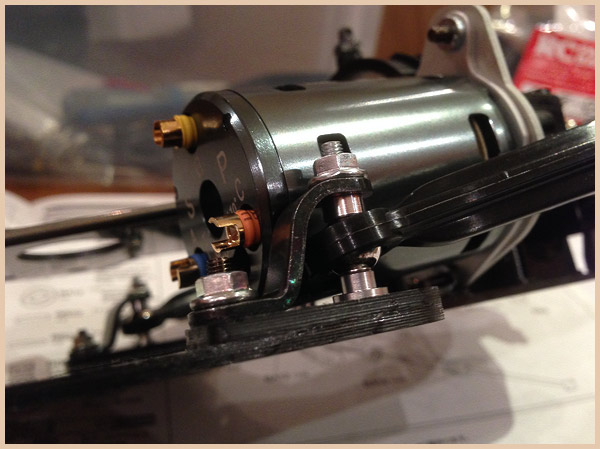
So, first up was the spur gear and torque splitter set up. I opted for the torque splitter due to going brushless, but not being great with this modern technical lark, I’m hoping that’s the best move. There were a couple of new bits used in this over the original, namely the rubber end seen here. Sure feels nice fitting this together.
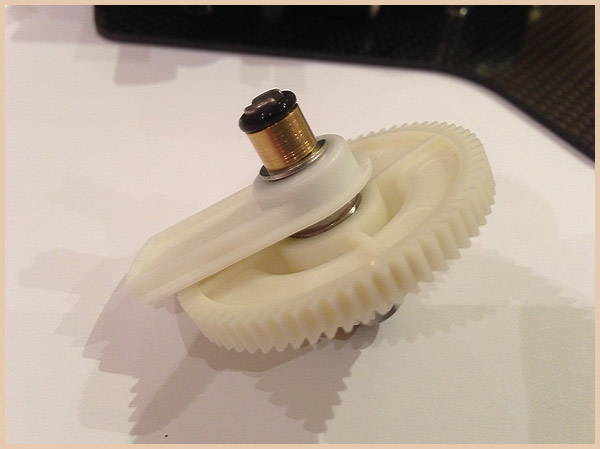
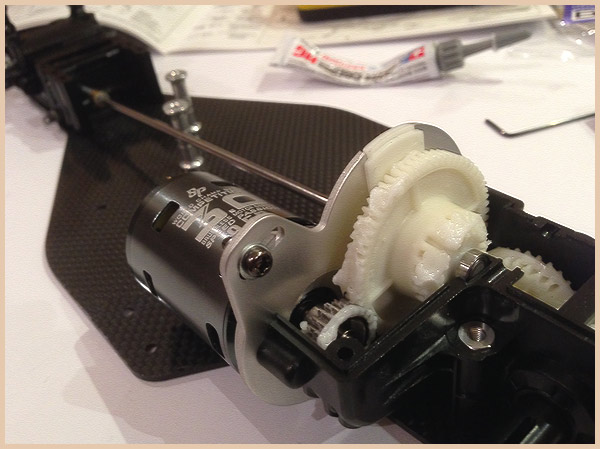
Installed and ready for the gearbox cover. I had to reverse the pinion gear here as when installed the way Tamiya advised, it was only getting traction with 50% of the spur. But I’m guessing that advice was based around Tamiya motors. Loads of grease again due to going brushless.
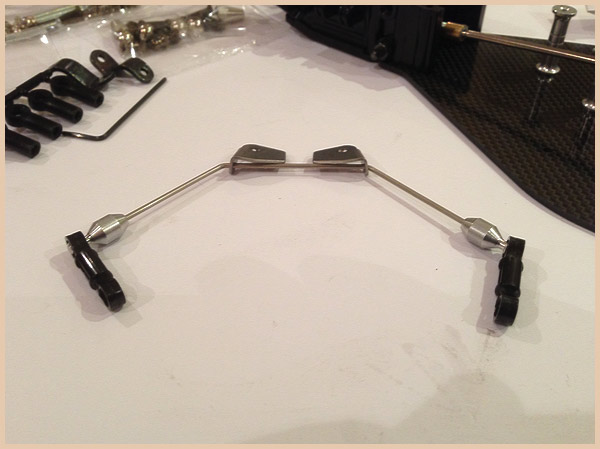
Onto the rear sway bar. Well, I can officially say that this is the first time I’ve built one of these and NOT had to get the Autosol/Peak on it. Nice and shiny, nice and new :)
Fitted and looking more and more like an Egress with every step.
Little close up…
And a booty shot…
The last gear assembly for the rear gearbox. No change here, all as original.
Rear gearbox casing fitted. Note to all Egress newbies, DON’T over-tighten the screw closest to the motor as it cracks the casing. This is something you find on about 70% of vintage models.
Another angle of the fitted cover…
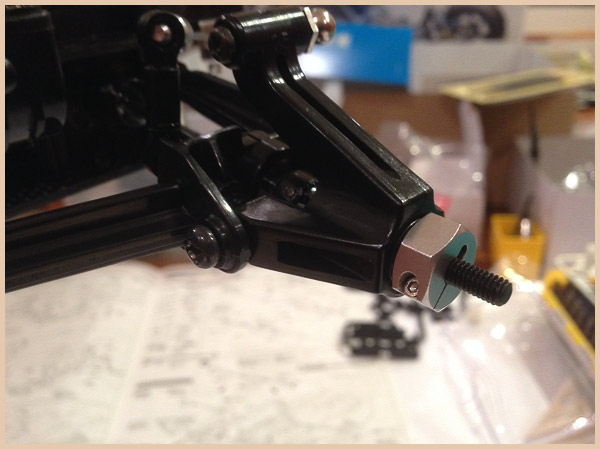
Onto the rear swing arms (is that the right name? Not sure). They feel bulletproof now. Nice work Tamiya.
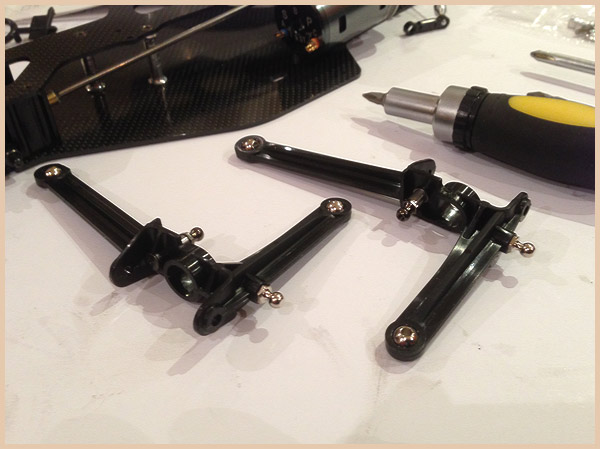
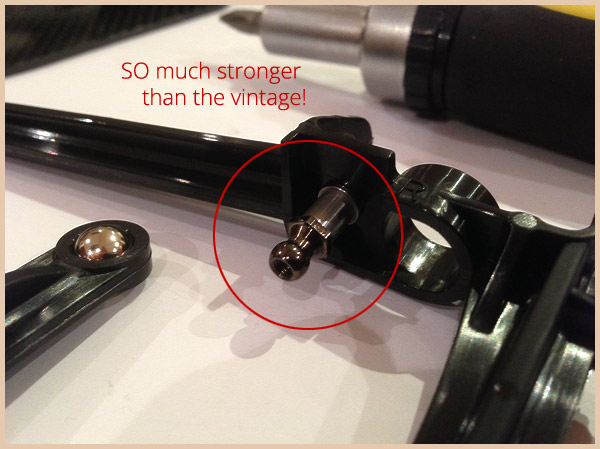
This completely new design is fantastic! The vintage one was quite weak, but this is great. A flat headed screw comes in from the other side of the arm, through a chunky spacer and then into this ball end. Its ROCK solid, well impressed.
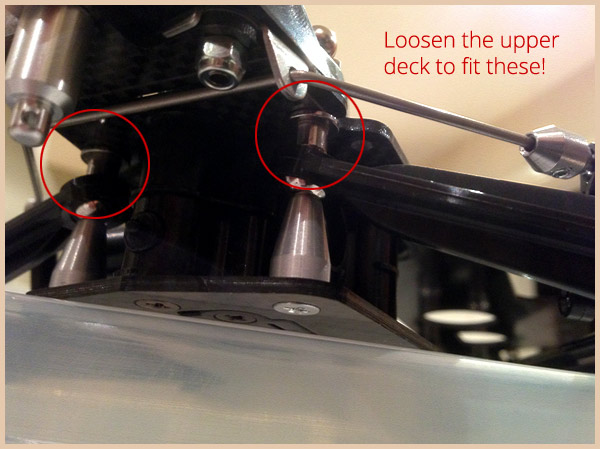
Now, word of warning folks. THIS WAS A COMPLETE BASTARD. If you follow the instructions, you’ll be here all day, all night and for the rest of your life trying to slide those demonic little spacers in. Basically, its too tight as they are microscopically bigger than the vintage ones. Stronger, but slightly bigger. I spent 20 mins trying to squeeze one in…every time it popped out and hit the floor, grrrr. I resorted to loosening the rear gearbox cover a few turns to give a few mm play in the top deck. With that done, they slid in as easily as the vintage ones. Just remember to tighten those screws back up after!
Another angle…again…Gotta say, feels like its built like a tank.
And another angle…

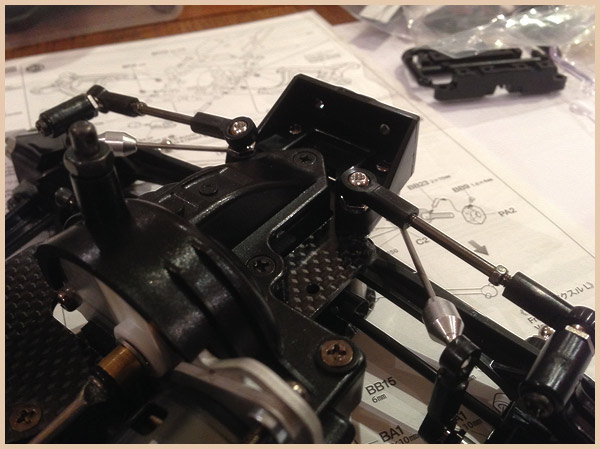
Close up of the new braces taken from the 2001. Great addition Mr Tamiya! A couple of new spacers in there too, all very nice.

Close up again…
And another angle…
I forgot to photograph the drive shafts as I made them, oops. They’re all new too, every last element of them, as are these looooovely new hubs. Light as a feather these!
Rear adjustable arms made and fitted. Again, feel totally rock solid.
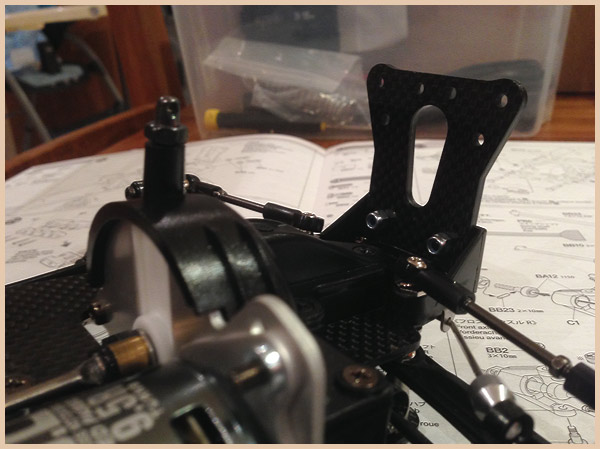
And to finish for tonight, the all new thick, carbon rear shock mount. Feels like I could slam this into a wall and it’d not flinch. So well built.
Somebody asked either via email, Tamiya Club or a comment (cant remember which) if I’d sealed the chassis, the answer is yes, both decs, chassis spacers and shock mounts. I just use Humbrol instant cement and a fine modelling brush. Seems to work for me.
Ok that’s it for today! More to come soon.
Mike.

I stripped down the front and rear suspension to find that my damper seals have all dried up and cracked, bummer! So in minor desporation I tried out some other damper seals from other Tamiyas I have knocking around…no joy, they’re all too small and a different shapes. I have however seen some on eBay which look like a match, so stay tuned to see if that’s another £5 down the toilet ;)
Yesterday I had to buy the Avante 2001 ball connector bag and bushings bag as it turns out this car of mine has all manner of odd parts used in replacement. Grrrr. And if you’re wondering why on earth I need the bushing bags from the 2001, its because I’m having to make a mod of my own to this car to allow it to mount the suspension to the whishbones in the same way as the 2001…why?…because those darn Egress suspension mounts are THE rarest part. Double grrrrrr.
Aaaaand lastly, I was in a real pickle with the dastardly 3×42 countersunk screws that hold the backend together, as the heads got rounded off getting them out, only for me to realise that only two cars made by Tamiya have EVER used those screws…and you cannot get hold of the associated screw bag for love nor money. But open some insanly long winded research, I found out that the last 2mm of these screws isnt essential, and that HPI make packs of 3×40’s…and you can get 10 for £3, job done :)

I just need to the bits to get here so that I can continue…new update soon.
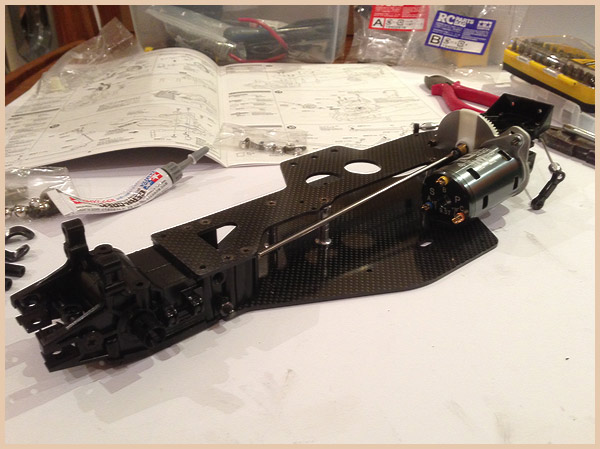
This is the first exciting part! Staring to stick the chassis together. Its only the main two plates, but what the heck, its nice to see some actual progress!

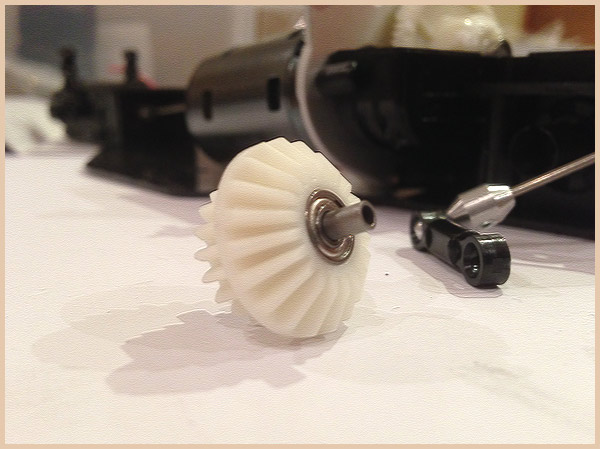
Well, that dastardly spur gear led me on an interesting path of discovery. It turns out that this spur gear is the one from the Avante 2001! Hmmmmm, seems strange. My initial thought was that maybe the previous owner had upgraded the Egress to have some of the improved Avante 2001 features, but I’m now thinking that maybe this car is actually an Avante 2001 with Egress bits on it, rather than the other way around. Hmmmm. Luckily, in one of the other parts auctions I won, it included the original Egress set up, including the ‘one way’ spur gear bits, so that’s been dropped in instead…and in a total moment of madness, I picked up a full NIP Egress plastic gear set, so the whole caboodle is being replaced with new parts…nice :)
Initially I was going to be a big girl and not strip the gearboxes down, but then thought to myself that, that wouldn’t really fit the bill on a full restoration, so I dove in head first! Initially I just stripped the gears out and started to work on the casing. It was thick in over 20 years worth of grease, oil and general crap, so I knew that this would need some serious effort to bring back to new.


First off I used a load of WD40 to breakdown the grease on the casing, inside and out. With the WD40 doing the hard work upfront, I then got a red hot bucket of water at the ready and new bottle of the world’s greatest de-greaser…fairy liquid. Why Fairy? Well, back in my biker days a mechanic once told me that the best way to clean and de-grease a messy bike chain was to use a mix of fairy and WD40. This technique saw me good for many years, and I knew it’d work here too.


So after 15 minutes hard scrubbing, the casing was gleaming like new. Magic. Coupled with the loooooovely new motor plate I’d picked up (yes more spending) it was looking beautiful.

Now onto the gears themselves.
As you’d expect, more than 20 years of grease and dirt is going to be pretty messy, so there were no surprises here (or where there? Find out more on that later in the post). I pulled every bit apart and treated it a good long soak in a bath of WD40, followed by a toothbrush clean up and dry off.

The bearings now move like silk and everything is nice and shiny. All ready for re-building, re-greasing and dropping back in.


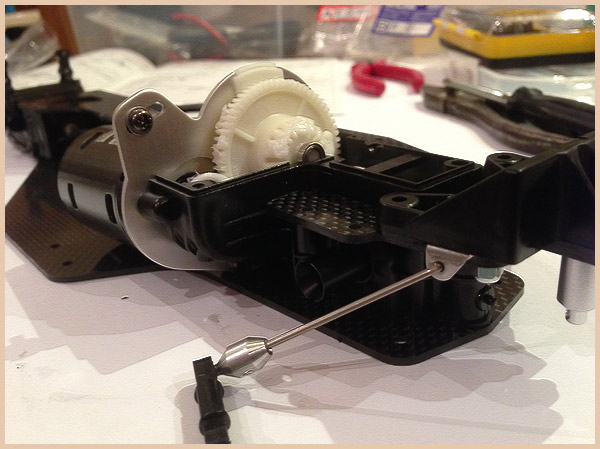
So, out comes the Egress manual. Everything is going back together as expected. But hold on, what’s this? The drive gear parts I have don’t match up to the instructions? What the hell?

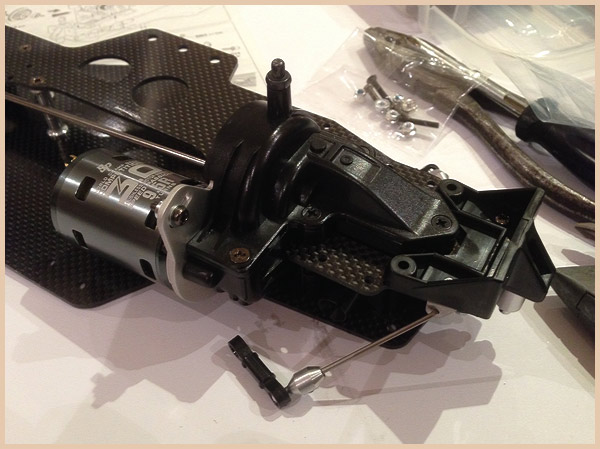
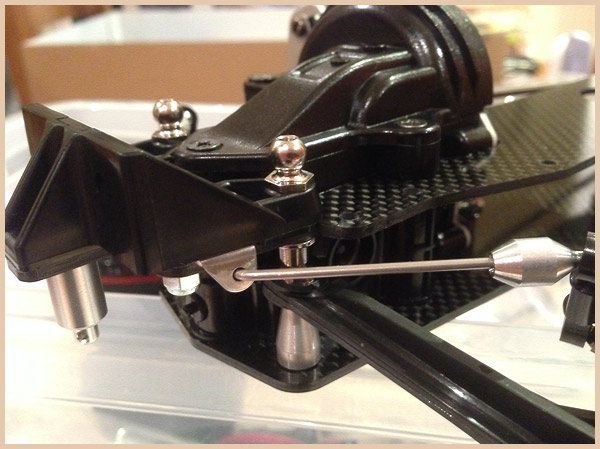
With my new rear carbon mount in hand, it was time to clean up the stabiliser parts and get that looking nice and new. I pulled this section apart, grabbed the Peek (http://www.tripeek.com/) and started cleaning and polishing. Man I love Peak, that stuff is the shit. Just look at the photos below, beeeeautiful.

Shiiiiiiiney, mmmmmm, nice!

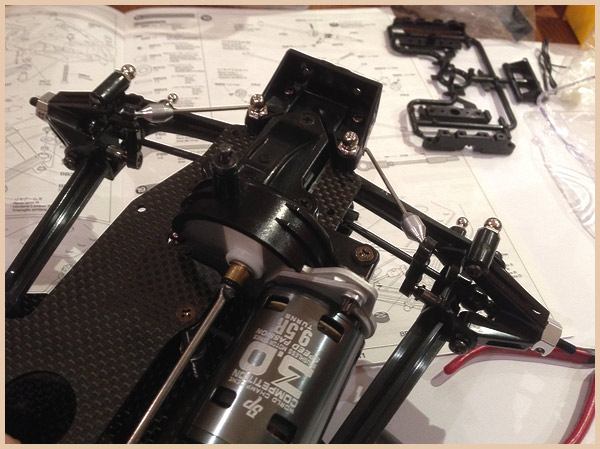
Mounted on the fresh new upper chassis deck, this is looking real nice!

In all its glory…man this car is going to be one shiny puppy when she’s done :)
Yep the chassis is in a right old state. All those years of racing, dirt, grit, oil and abuse have left it rather tattered. And worst still, the end tip where the under-cowl mount connects to, its snapped. Arse.


A solid clean up did little to lift it, so I’ve caved in and bought a new one. Top and bottom pieces, brand new, £25 delivered. Steep? Not sure, but damn they look pretty. Add to this the big Egress parts auction I won, including carbon bits, I’m staring at some lovely new pieces to build this baby back up. And yes, she’s turning into a veritable money pit…but boy is it fun!!!

Yep you read it right, there is a Madcap in our midst. ‘Why?’ I hear you ask, well, there’s a good story here. I was again browsing eBay, when low and behold there before sat a mint, restored, unpainted Madcap with ‘upgraded wheels’…HOLY SHIT, not just upgraded wheels, but the bloody Egress wheels and brand new rear tires!!!! Rrrrrresult! Bought. The car was for sale for pretty much what the wheels were worth, so it seemed daft not to buy it. If you’ve read the about page, you’ll know that I used to race a Madcap and fancied getting one again someday, so this was hitting two birds with one stone. Magic.
Now, whomever is reading this will most likely know the Egress, and will be chuckling to themselves after reading my shopping list from the previous post…as that list is like a list of the worlds finest variety of hens teeth. Yep you guessed it, this car is missing the rarest, and hardest to source parts made for the car. Arse!
What I have managed to do is win an auction with a bucket load of Egress parts in it. Some I need, some I don’t, but what the hell, it’s been an easy way to grab some fresh pieces. And after some serious hunting, I fear that some of the previously mentioned parts are going to cost me the earth if and when they arise for sale.
The other major win was the screws. Most of the ones on this Egress have seen better days, with most of them being totally over tightened and having their heads rounded off. So rather than spending £10-£15 per screw bag on eBay, I did a little research on the Avante and Vanquish to see which ones had the same screws. I know, I know, this wouldn’t include titanium ones, but hey, that’s life. Needless to say, the Vanquish screw bags were about £3 each, so I snapped them all up, only leaving me short of a small handful.
Let’s move on.

If you're looking for the Egress manual as I was when I first started on this glorious adventure, then please head over to Tamiyabase.com
All products, images, and contents on this website are the property of their respective owners
Website by Fully Illustrated