
17 Dec
2013
Hey guys,
Quick video of the beauty in action. Nothing special, just a quick test up/down a street on a cold and frosty morning.
Hey guys,
Quick video of the beauty in action. Nothing special, just a quick test up/down a street on a cold and frosty morning.
Hey Everyone!
SHE’S FINISHED! Wahoooooooo!
Man, this has been THE single best RC build of my entire life and boy have I built a lot of cars. Such a fullfilling experience! This car has lived up to all my dreams and expectations from childhood, in fact, its surpassed them! Amazing. Ok, onto the last steps…
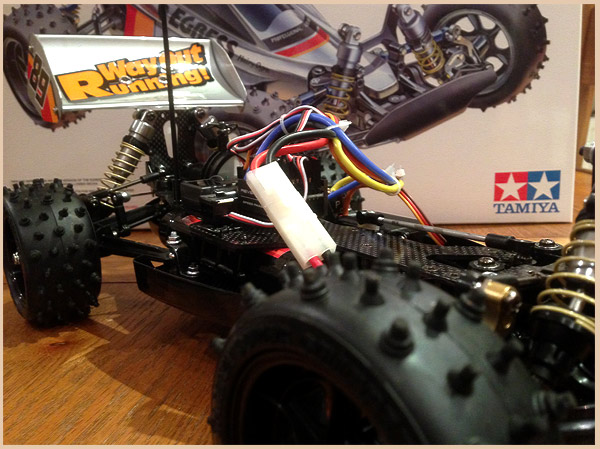
So, getting the wheels on, simple, as you’d expect. Next step was getting the electrics in…simple…and hard in equal measures. The servo went in like a dream, no issues there whatsoever. The Spektrum DX3 reciever also went in a like a dream. The Reventon S ESC however proved troublesome. Not in regards to fitting it, that it was easy, from the angle of setting it up. I’m a brushless noob, so found it a real pain in the ass. Its just SOOOOO complex compared to the old school stuff I know. After a quick call with the awesome Modelsport from whom I bought it, they talked me through the basics and we got it set up in minutes. Man, this thing has A LOT of different settings.
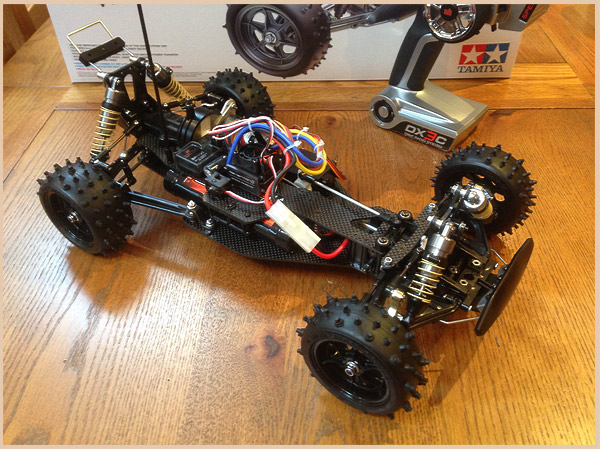
Next challenge, and boy was it a challenge, was getting the damn battery in! Its only a HPI 4500mah Nimh, but jeez, talk about a tight fit! Just like the old vintage model. The battery retainer (the bit that has a body pin holding it in) had to be modified heavily to make the battery stay in. The finished article is a little ugly on close inspection, but it stays in place, which is what counts. Word of warning. If you’re sticking in a chunky lipo, please be aware that it may not fit. Space is at a real premium here.
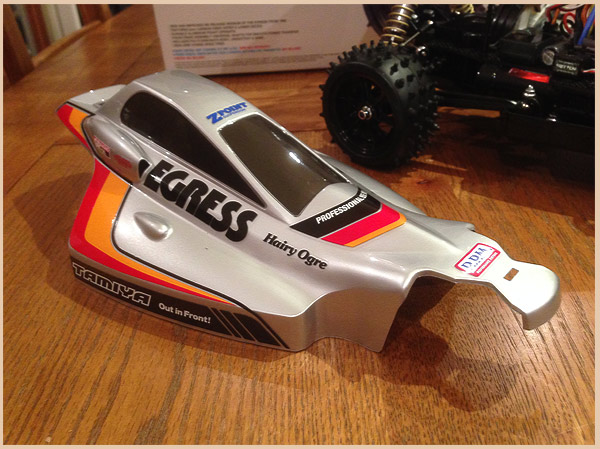
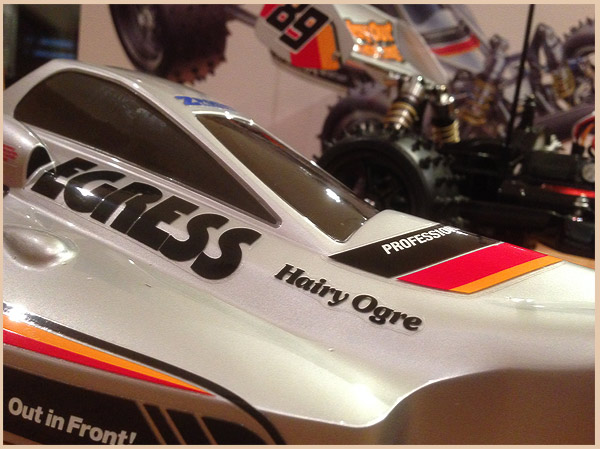
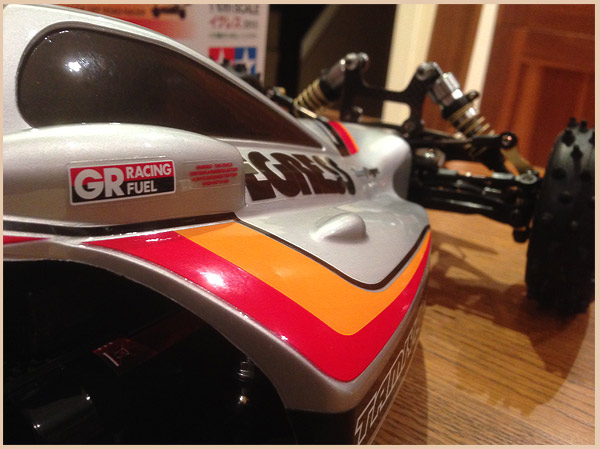
After all the electrics were in and I’d given it a quick test, I set to work on the body painting. With a handful of coats on, it was ready for the decals, my favourite bit!
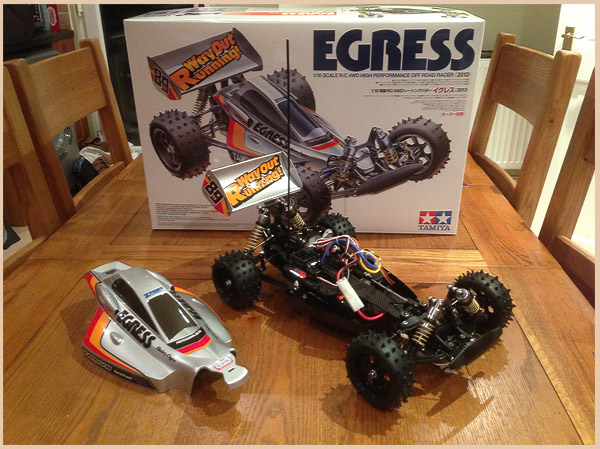
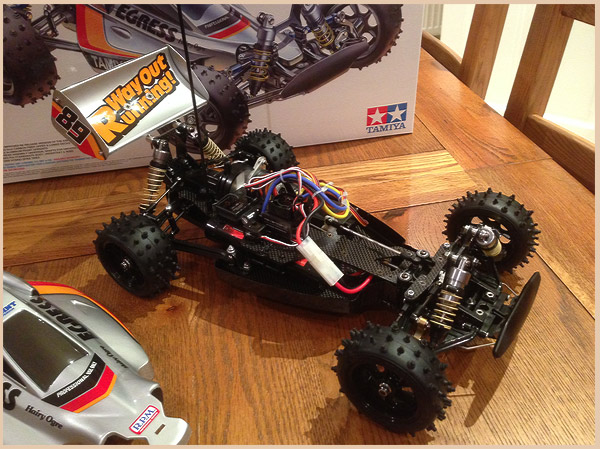
So, there you have it, the full step by step build of the 2013 re-re Tamiya Egress. Just incredible.
Stay tuned as I’m going to do a couple of videos of this over the next week or so, so that you can see it in action. Awesome!
Mike.
Hey Everyone!
Ok, so time has been against me, work, life and an Xbox One and PS4 have been vying for my time ;)
Anyway, last night and my lunch break today gave a good window to chew through most of the remaining build, read on!
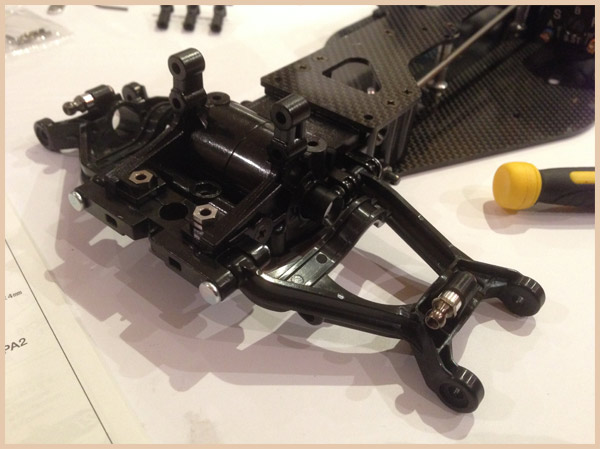
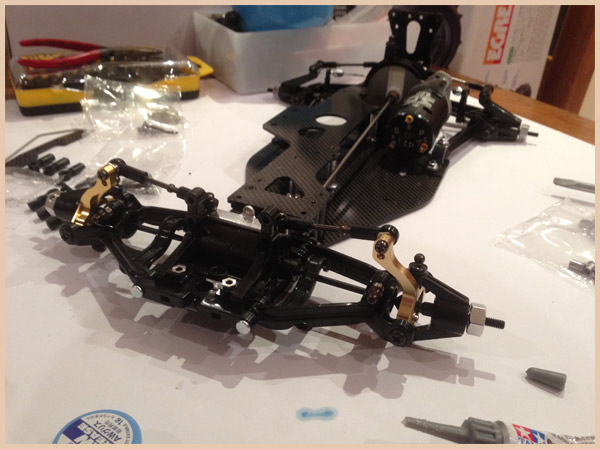
First off, the new front lower shock mount design. This is what has replaced the BF8/BF9 design, which has annoyed and pleased many folks. It was an iconic design, which is something that people feel should have stayed, but in reality, it was rather weak and this new design is super strong in comparison.
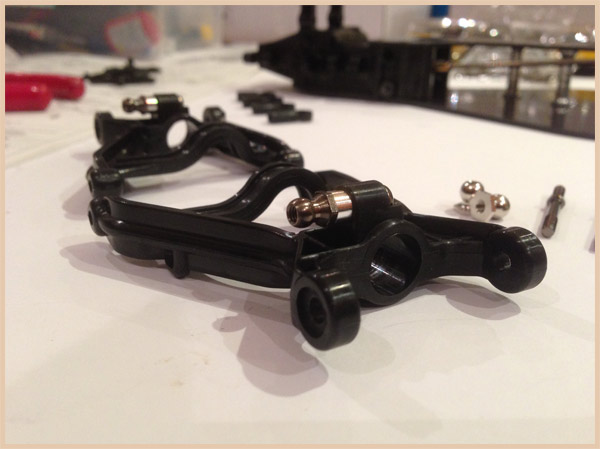
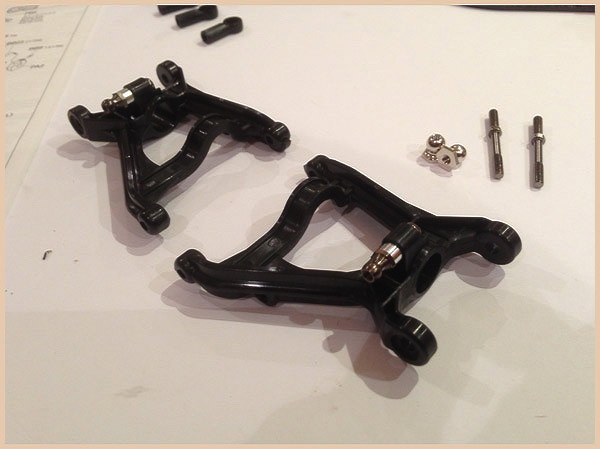
And the two wishbones fitted, nothing new to report here…move along…
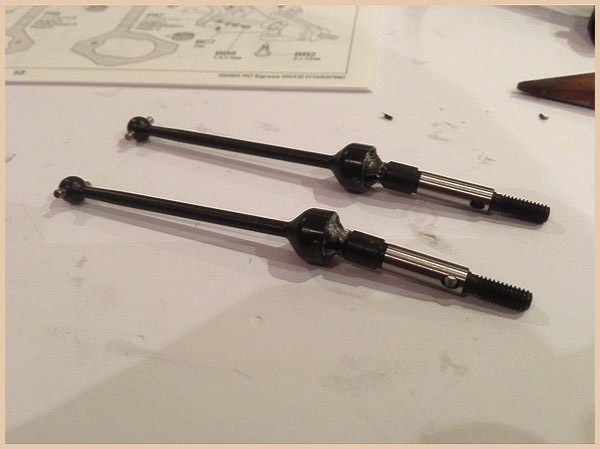
These are the new drive shafts that I forgot to photograph when building the rear end, so here are the font ones for you to look over. 100% new over the original design, but they do feel pretty sturdy. Bit of a PITA to make as they don’t come constructed, you have to build them yourself and use that horrid silver, sticky anti-wear grease. I hate that stuff ;)
PHWOAR! Here’s the new golden bling! Don’t they look lovely! And just to note, the only thing that is original to the vintage car here is the plastic knuckles. Everything else is new pretty much.
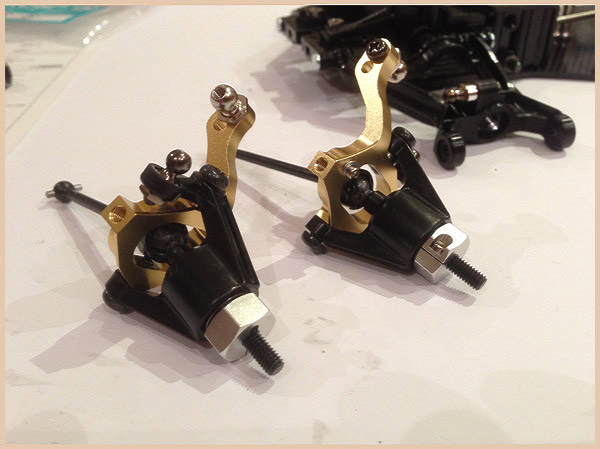
More gold porn…
Fitted and looking loooooooooooovely.
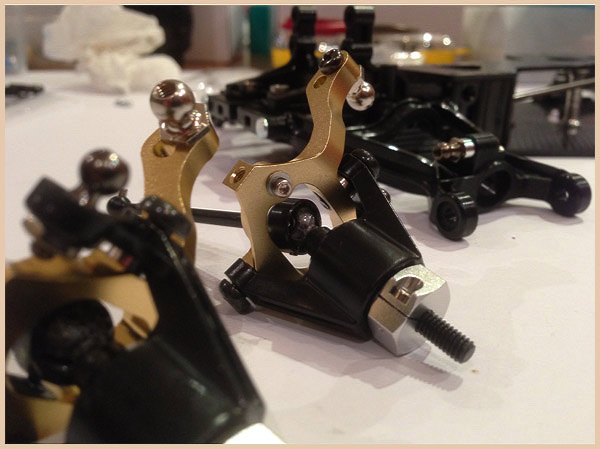
And again…
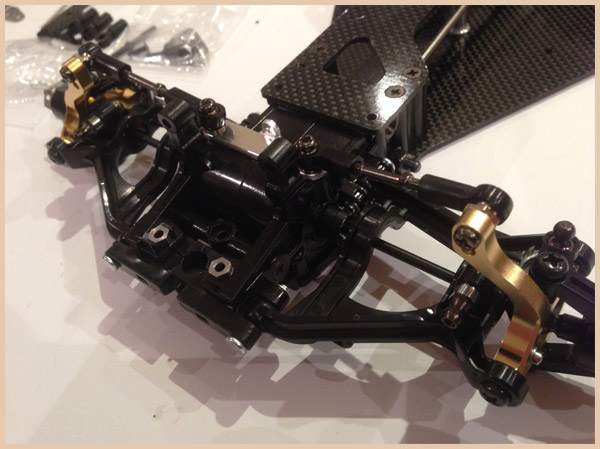
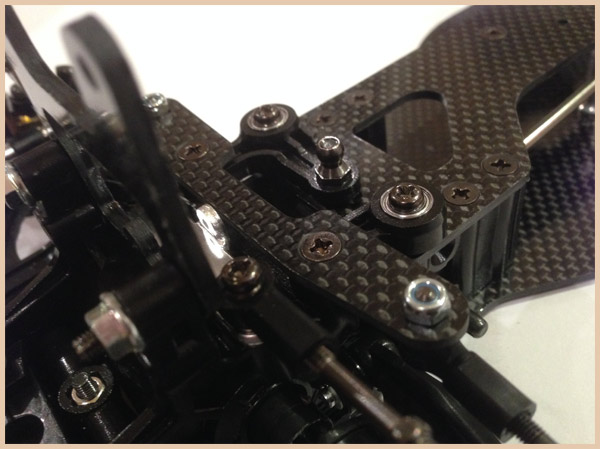
And here’s is the new front shock tower, super thick, super strong. I like this a lot!
An Egress is appearing, but not as we know it!
Nice new steering system built and fitted. This is very much like the original, only the materials and one screw design is different here.
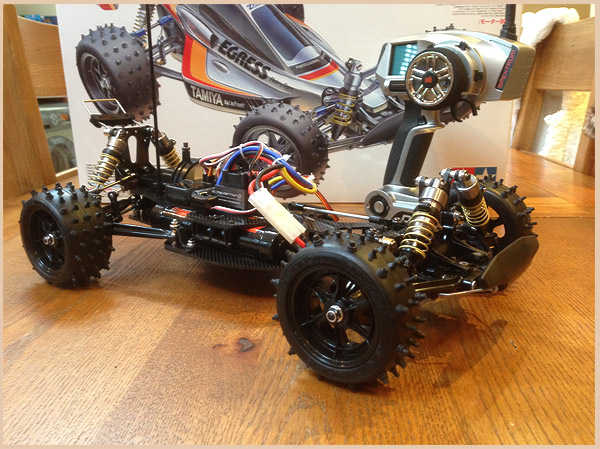
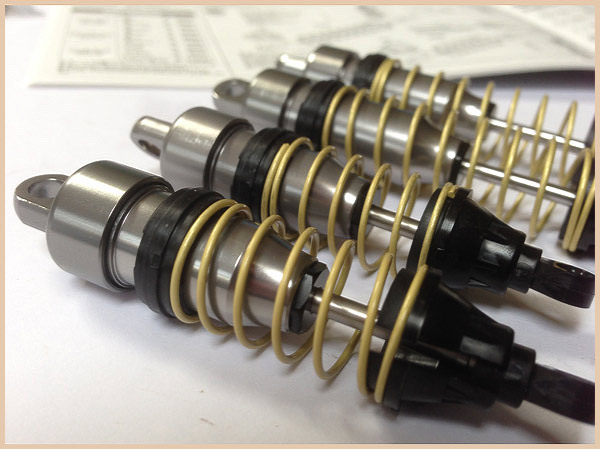
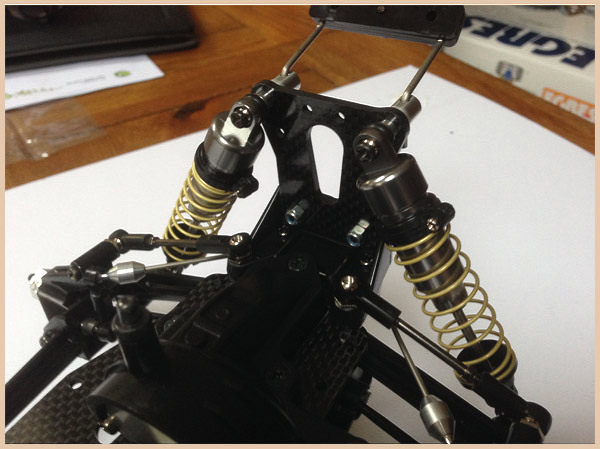
The moment I have personally been waiting for, the bloody gorgous matt gold springed shocks! These are SOOOOO stunning! Lets slap’em on this beauty!

Actually some more close up action first…
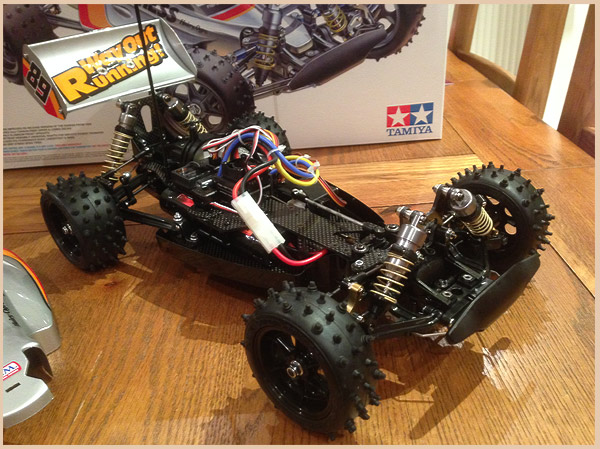
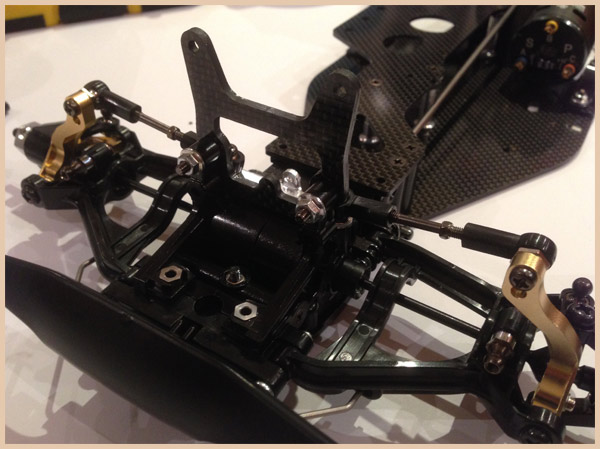
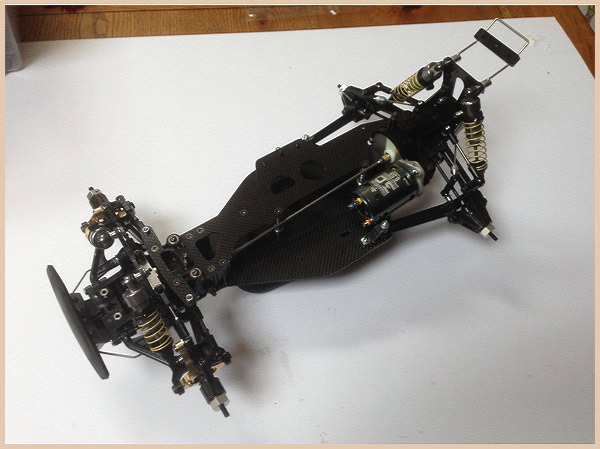
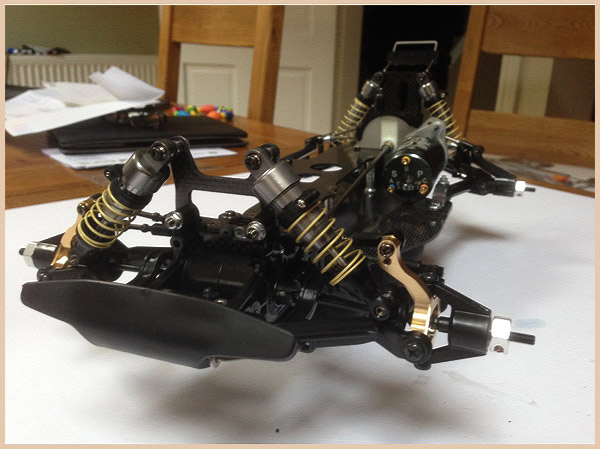
FITTED! God damn this car is looking so, so sexy! What a beaut!
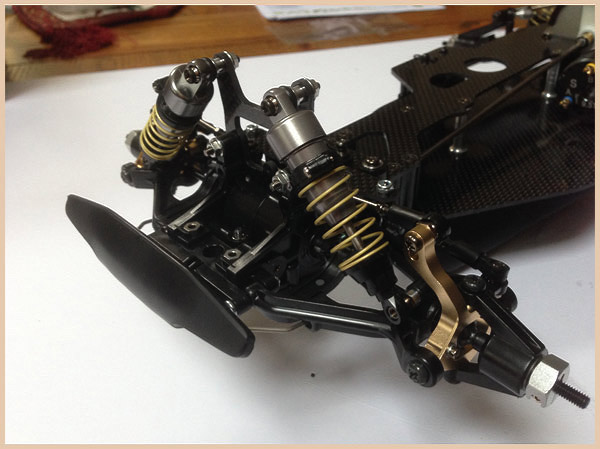
Nice close up of the front end to see all the new details…
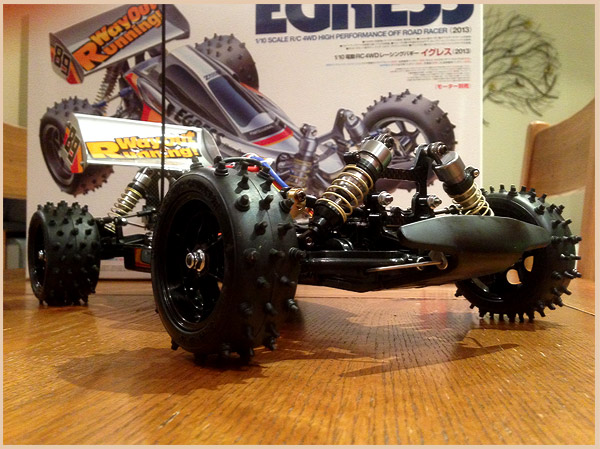
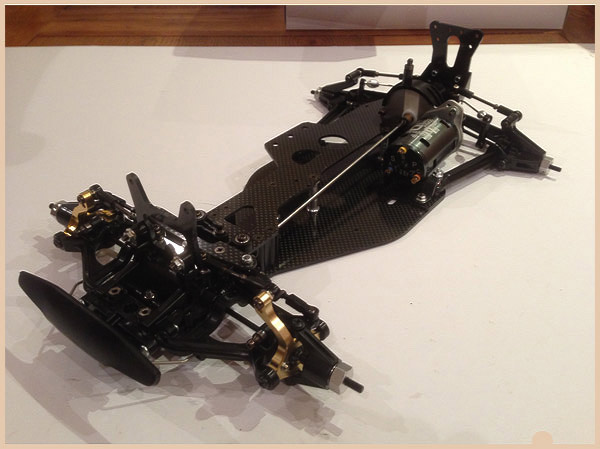
And a close up of the rear end with the classic high lift wing mount. Iconic design!
And another…
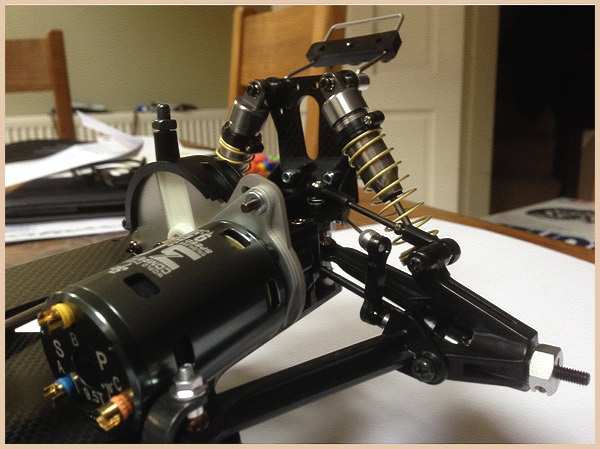
And one more for good measure!
Next is the servo mounting, wheels, tyres and electrics installation. BRING IT ON!
Mike.
Hey Everyone,
So between work, and family, starting this has been a challenge…but last night I got a 3hr window all to myself and guess what…the Xbox One got pushed to one side…to make way for the Egress!
What I will say before going any further is WOW, building this puppy is literally a dream come true and you know what, it lives up to my expectations in every way. All in all, across my 3 vintage Egress’s and my 4 Avante 2001’s, you’d think building this chassis would feel boring now right? Not a chance. Building this from new is so unbelievably rewarding its hard to put into words.
Tamiya always do a pretty top job with their kits, but this baby just slots together perfectly, a really masterfully made kit.
Ok, onto the build…
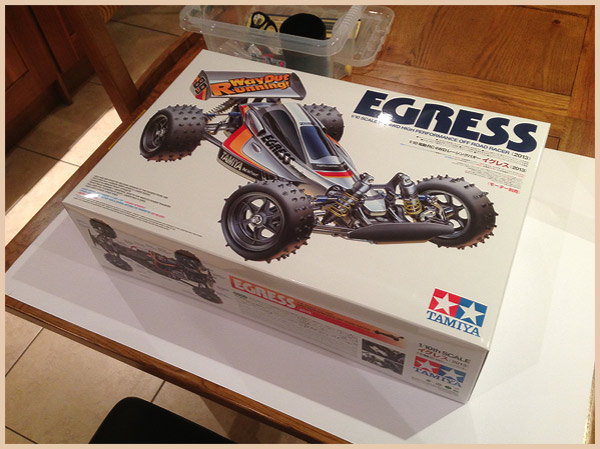
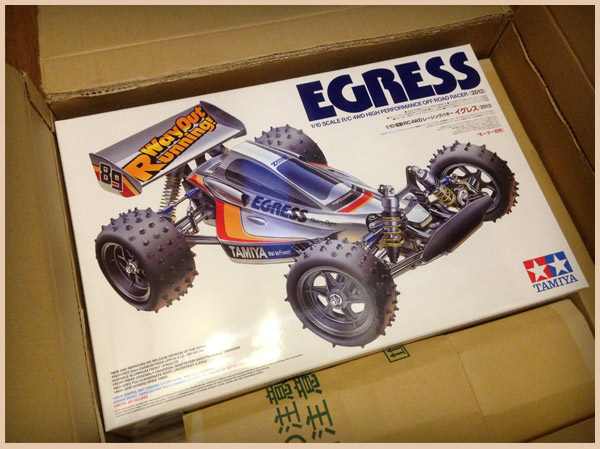
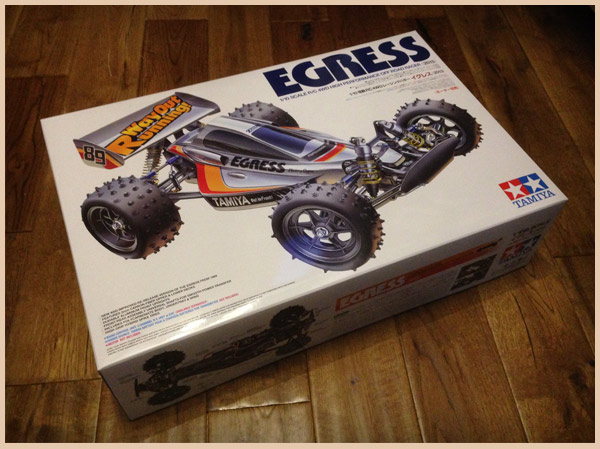
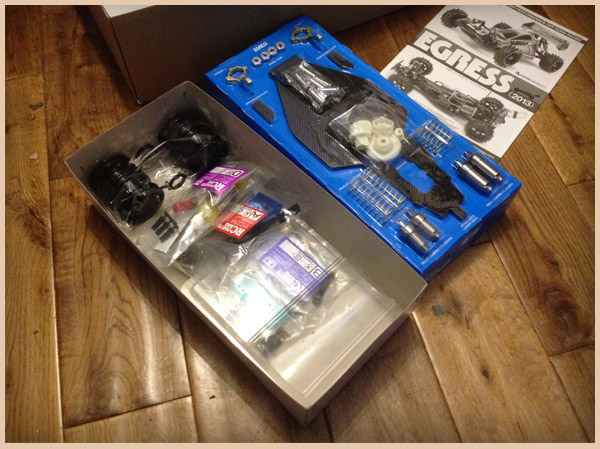
Opening this box is rush, as I’ve been dreaming of opening a NIB Egress for about 25 years now…oh momma!
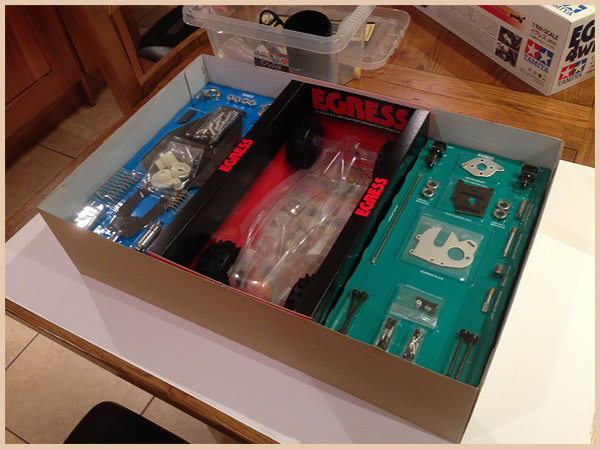
With the box open, it was time to open up those crispy fresh instructions and start building the best RC car that Tamiya ever made!
First up was the rear gearbox casing. First thing I noticed were some new screw styles and the addition of the foam padding. If you can find me a classic that’s been run and DOESN’T have any wear in that spot, I’ll be amazed. Nice move Tamiya, these Egress’s will retain shiny gearbox plates forever more!
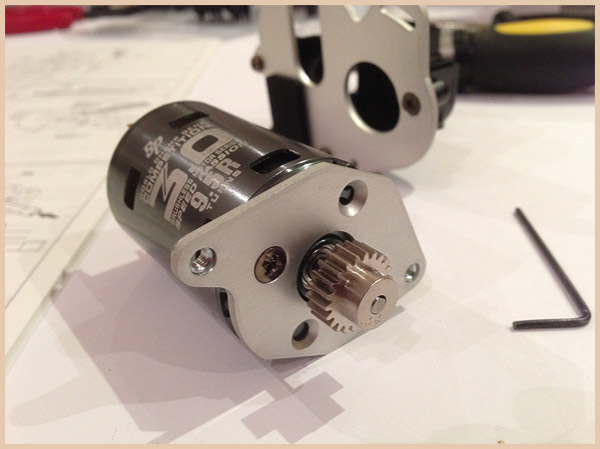
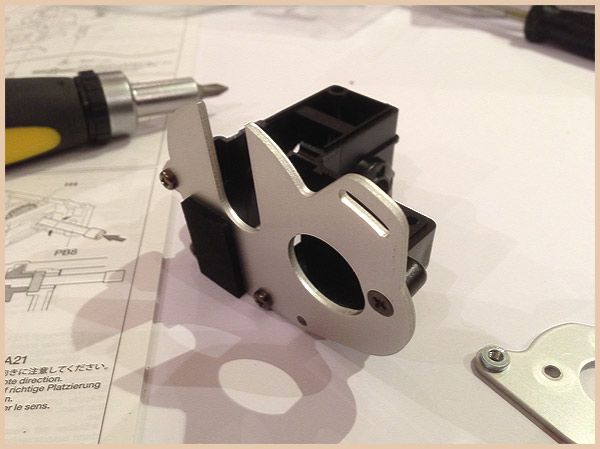
Now, being a daring soul, I decided to go all modern and use a brushless set up for this Egress. I’ve done this mainly for great run times, as I intend to dial back the power on this 9T bad boy as I don’t want to be buying tires after every run or melting my gearbox ;) My Spektrum DX3 has all kinds of settings so I think I can reduce the max power output that way. Oh and yes, idiot here used the wrong screws on the motor mount, I realised this once I’d got a few steps later down. You need the tiny stubby ones here!
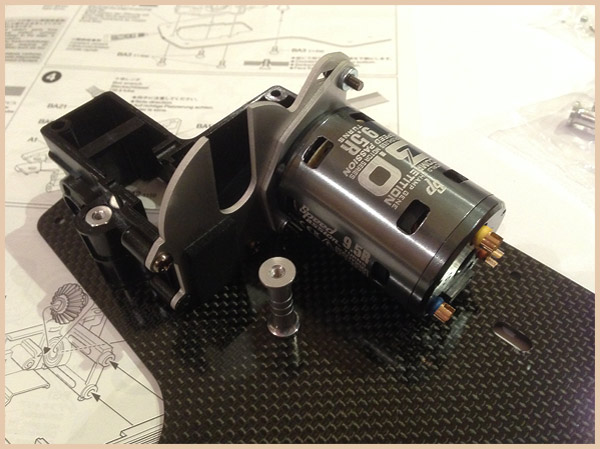
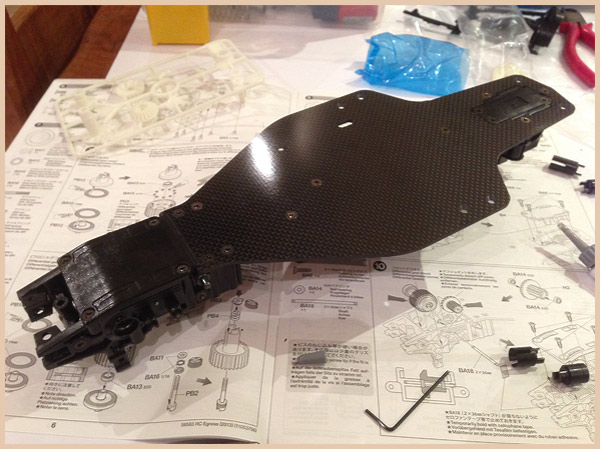
Phwoar! Box fresh carbon chassis! All my vintages have some degree of wear here and there, so seeing a clean, fresh new plate like this was rather special…it’s going to be dirty soon so I’m going to enjoy this while I can! Again, everything is slotting/screwing together like a charm. Top job Tamiya!
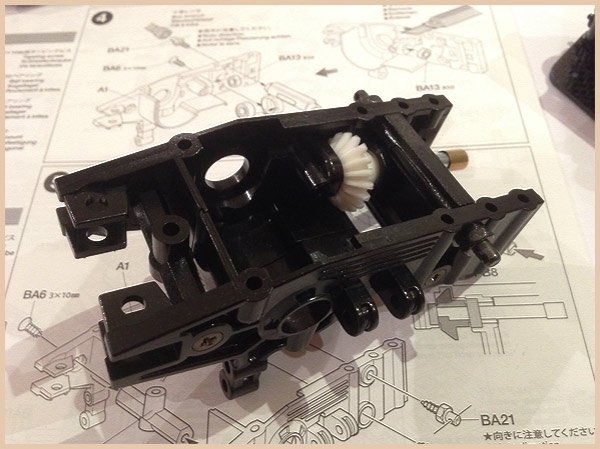
Onto the front gearbox, nothing new to report here, but again, its damn nice to be building this from scratch and not soaking each of these pieces and scrubbing them clean ;)

Mounting the front geabox was a dream, nice and easy. Its already looking sexy!

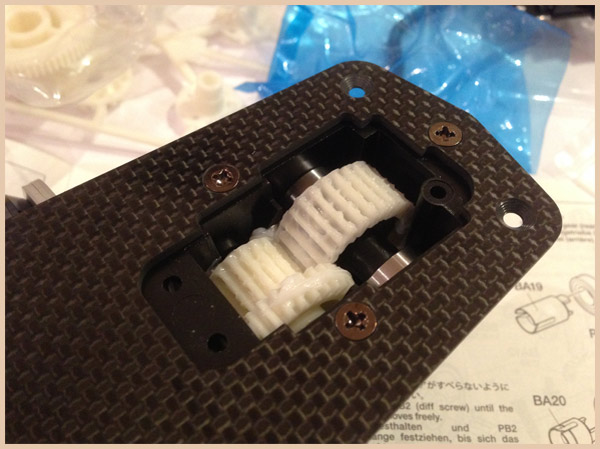
Front diff together. If you’re new to building cars like this, here’s one HANDY tip. Make sure you put a nice fat blob of diff grease in the whole where each tiny bearing is to be dropped in…why?…well, you ARE going to drop one, or two, or three while doing this, so it makes life a lot easier if there is a blob of grease in place to catch them as they drop. Also, make sure you have a clear open space when doing this bit, as when a ball bearing brakes loose, its near impossible to find if your build space isn’t super clean.
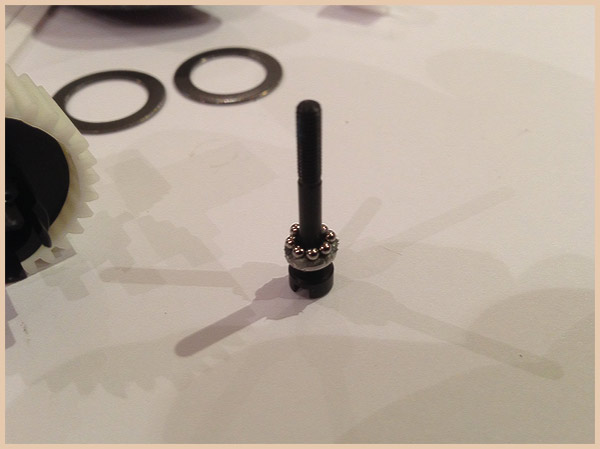
Now, this bit is a seriously intricate bit. These bearings look big right? Wrong, I’m zoomed in. These little spawns of Satan are crumb sized. Drop one and its gone forever. The end.
Tamiya advises you to put some anti-wear grease on the washer…sod that…pile it on! You need a good thick cushion of the stuff as if you have even remotely adult hands/fingers, you can barely feel these bearings, never mind skilfully guide where they are going. Slap a load of grease on, and drop each one on. Once all on, use a toothpick to adjust their positioning. And once that’s done, slap some more grease on the underside of the top washer and make a bearing sandwich. Just be careful that none of the bearings push out as you squeeze the two washers together. I then used my finger to smooth the excess grease around the bearings for an additional level of security.
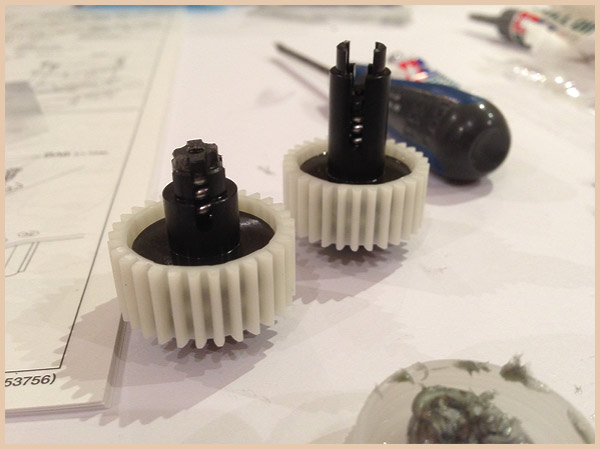
Both front and back diffs together. They just need tightening to finish.
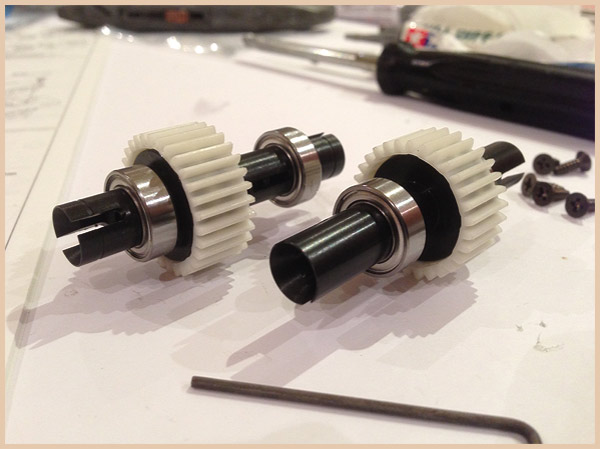
Awwww what a lovely couple. The two finished diff’s all built and complete. These are quite different from the vintage diff’s, almost all the parts bar the plastic gears are new, but man, they feel like they are made from adamantium, so I doubt they’re going to wear any time soon.
I know this sounds sad, but seeing a minty fresh rear gearbox enclosure like this is heart-warming. You beauty.
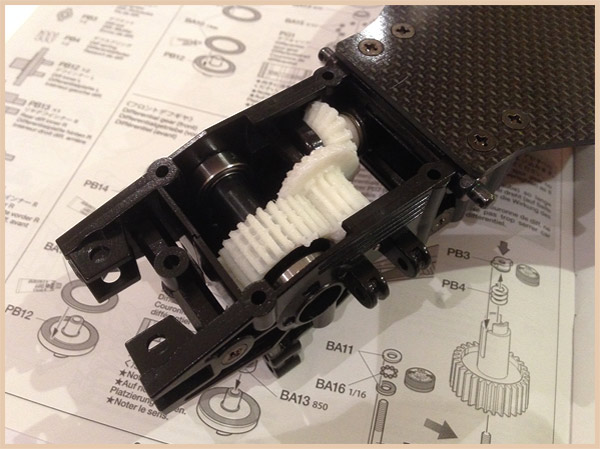
And the same again at the front. And yes, I went to town on the grease as I’m going brushless…I don’t want to melt these little lovelies.
And the last step for tonight is closing those finalised gearboxes. Another thing worth mentioning is how perfectly the plastics are cast. That rear gearbox plate just dropped in place to a perfectly snug fit. Serious quality.
More to come tomorrow!
Mike.
So, I’ve essentially been waiting to own a brand new Egress since, well, forever. And today, OH MY GOD, that dream came true!


Expect the full build article very soon :)
Mike.
Oooooh the excitement is building!
After a monumental battle to get hold of one, mine is due to arrive tomorrow according to my tracking details. I was lucky enough to bag one from Banzai Hobby in Japan after placing orders for no less than 4! But the other orders didn’t come off, as if you’ve been around the forums, you’ll know that stock is super limited and only a few landed in shops outside of Japan.
I’ll post some piccies tomorrow and possibly and unboxing vid too…if it arrives anyway ;)
EXCITED!!!!
Oh and if you haven’t heard, Tamiya are also re-releasing the Avante 2001 bodyset too, YES!
Mike.
Oh my god! She’s a beauty! Just found this Tokyo Hobby Show footage on YouTube…
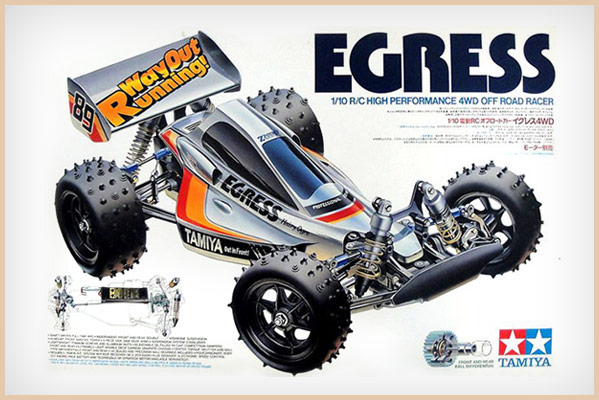
Yey, the official Tamiya product shot has been released and boy does she look stunning!

The first thing any keen eye’d folks will notice is that the classic front shock set up has gone. So no more BF8 and BF9 parts! And in doing this, they have also changed the shock mount to accommodate the difference in height too. Hmm, I’m unsure if this is a good change or not. The shock mount was a defining feature that every Egress fan on earth knew and loved. But hey, these are going to be runners, not shelfers. So I’m guessing Tamiya have adjusted this to make it run/handle better. Visually it makes the Egress look more low down, more streamlined for speed, but I personally prefer the tall look she had originally.
You’ll also notice no blue rod ends…NO BLUE ROD ENDS! This again was a defining feature that always looked sweeeet on the vintage model. BUT, there is a valid reason for this. If you look at the front hubs, gone are the weak old matt grey ones in place of their re-designed rock solid gold ones from the last Avante RE-RE. I personally think these looks STUNNING. Now, anyone with an eye for colour co-ordination will notice that gold and blue really don’t work together, so this explains dropping the blue rod ends and I can live with that :) I actually prefer this look…by quite an extent.
And last but not least, the typography on the Tamiya logo (sides of the car) has changed to the new version. Again, not fussed personally, it only helps keep the value of the original decal sheets in tact.
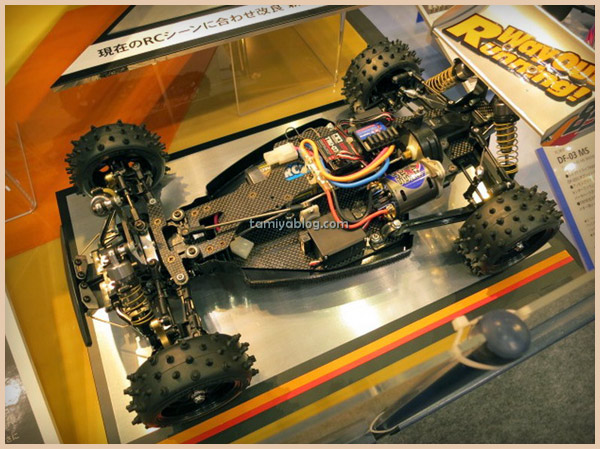
Tokyo Hobby Show Shots:
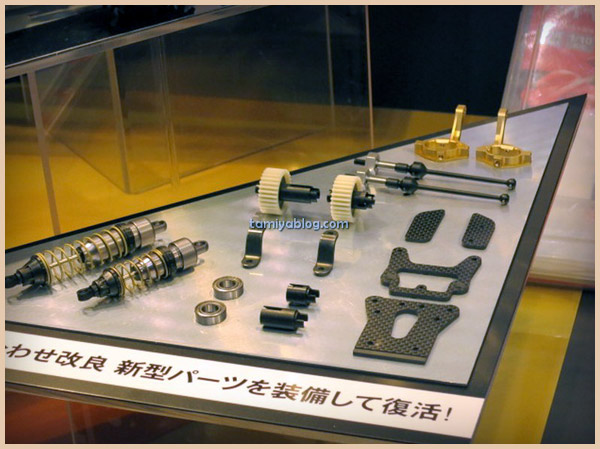
These just in are courtesy of Tamiya Blog and go on to detail the new front shock mount in close up…it looks A LOT stronger than the original, so for running, this gets a big thumbs up from me.
The Egress in all her gold hubbed beauty!
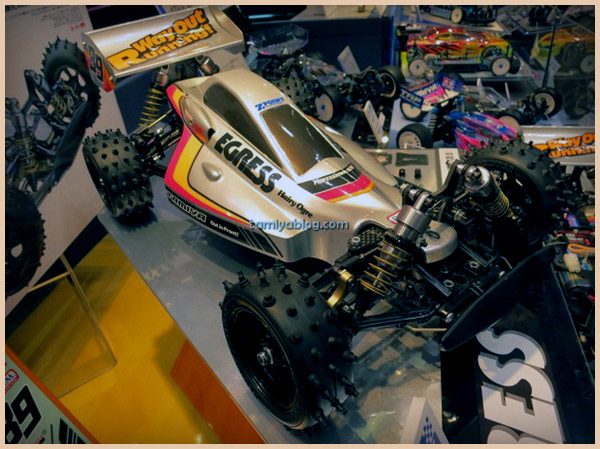
And the classic Egress carbon chassis, as sexy as ever before.
BRING ON NOVEMBER!!!!
Yep, you read it right, its been confirmed on Tamiya Blog that THE greatest (obviously a biased opinion) Tamiya RC buggy ever to be made is FINALLY getting re-released! Yahooooooooooooo! It was confirmed by Tamiya at the Tokyo Hobby Show recently!
This certainly wont be a cheap kit, and I’m guessing it’ll be tipping the $500 mark based on the Avante Black Special pricing, so start saving Egress fans as you’re gonna need two :) One for the shelf and one for bashing!
There’s a big discussion on this over on Tamiya Blog, so pop over and join the chatter if you like!
Watch this space for more info and the obvious pics when this beauty ships and lands in my loving arms!
Mike.

If you're looking for the Egress manual as I was when I first started on this glorious adventure, then please head over to Tamiyabase.com
All products, images, and contents on this website are the property of their respective owners
Website by Fully Illustrated