
17 Dec
2013
Hey guys,
Quick video of the beauty in action. Nothing special, just a quick test up/down a street on a cold and frosty morning.
Hey guys,
Quick video of the beauty in action. Nothing special, just a quick test up/down a street on a cold and frosty morning.
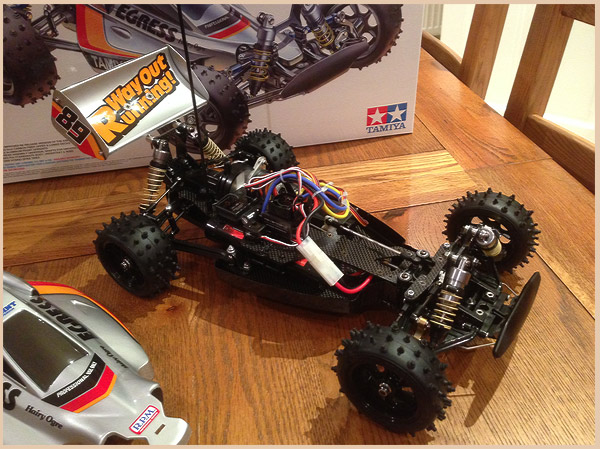
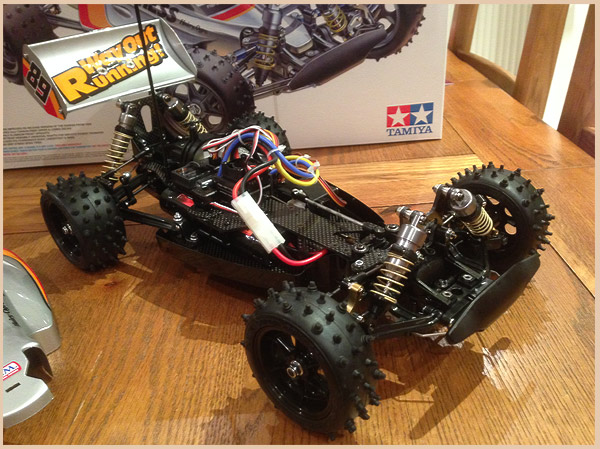
Hey Everyone!
SHE’S FINISHED! Wahoooooooo!
Man, this has been THE single best RC build of my entire life and boy have I built a lot of cars. Such a fullfilling experience! This car has lived up to all my dreams and expectations from childhood, in fact, its surpassed them! Amazing. Ok, onto the last steps…
So, getting the wheels on, simple, as you’d expect. Next step was getting the electrics in…simple…and hard in equal measures. The servo went in like a dream, no issues there whatsoever. The Spektrum DX3 reciever also went in a like a dream. The Reventon S ESC however proved troublesome. Not in regards to fitting it, that it was easy, from the angle of setting it up. I’m a brushless noob, so found it a real pain in the ass. Its just SOOOOO complex compared to the old school stuff I know. After a quick call with the awesome Modelsport from whom I bought it, they talked me through the basics and we got it set up in minutes. Man, this thing has A LOT of different settings.
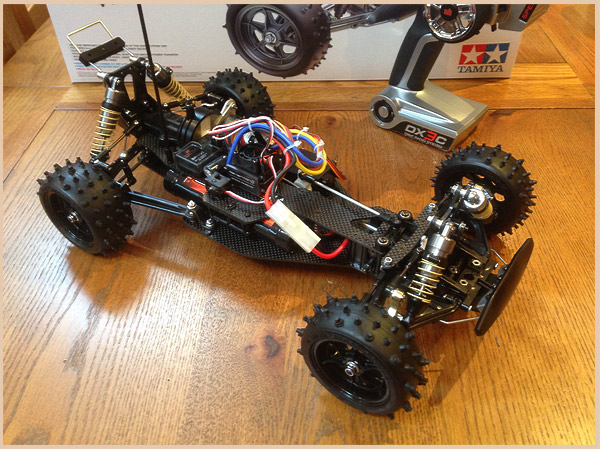
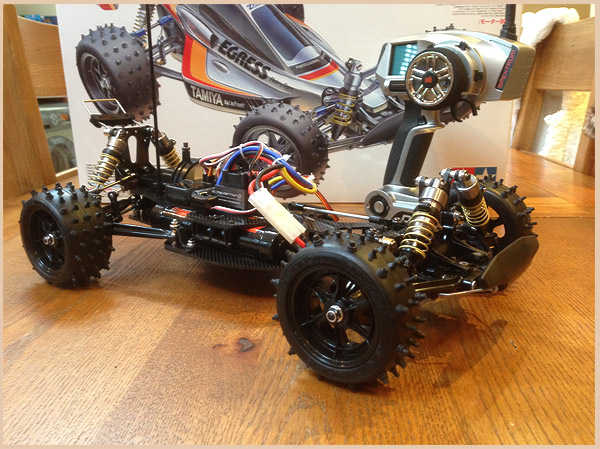
Next challenge, and boy was it a challenge, was getting the damn battery in! Its only a HPI 4500mah Nimh, but jeez, talk about a tight fit! Just like the old vintage model. The battery retainer (the bit that has a body pin holding it in) had to be modified heavily to make the battery stay in. The finished article is a little ugly on close inspection, but it stays in place, which is what counts. Word of warning. If you’re sticking in a chunky lipo, please be aware that it may not fit. Space is at a real premium here.
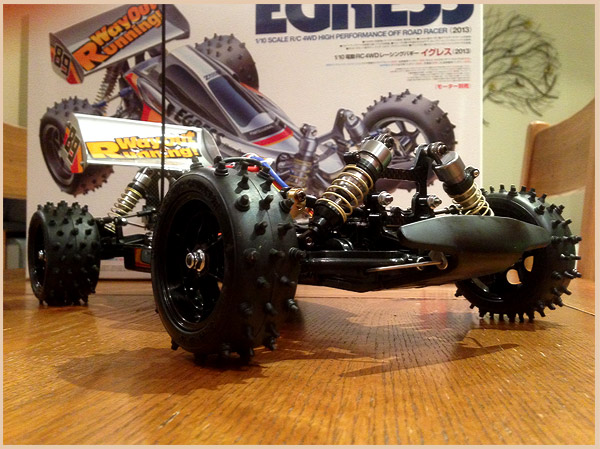
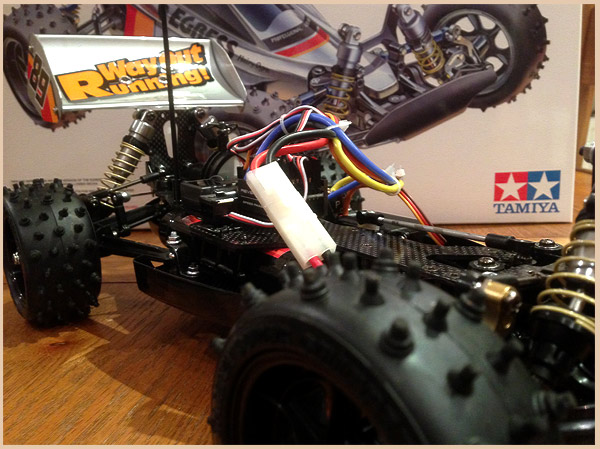
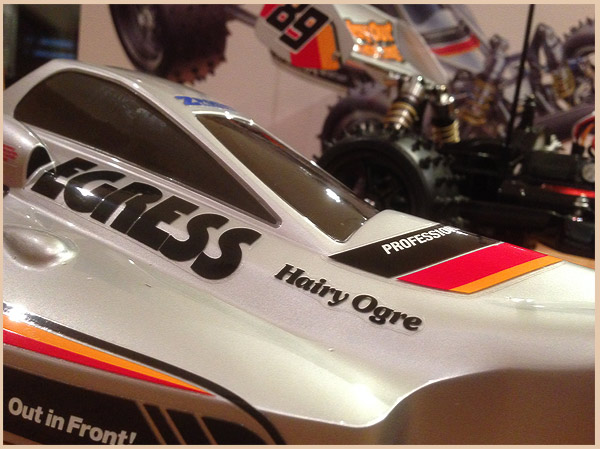
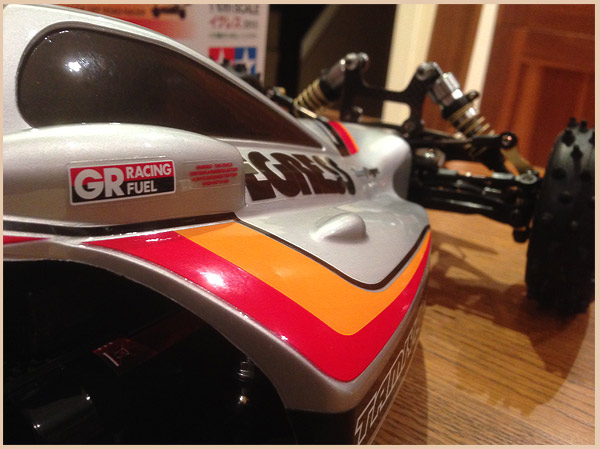
After all the electrics were in and I’d given it a quick test, I set to work on the body painting. With a handful of coats on, it was ready for the decals, my favourite bit!
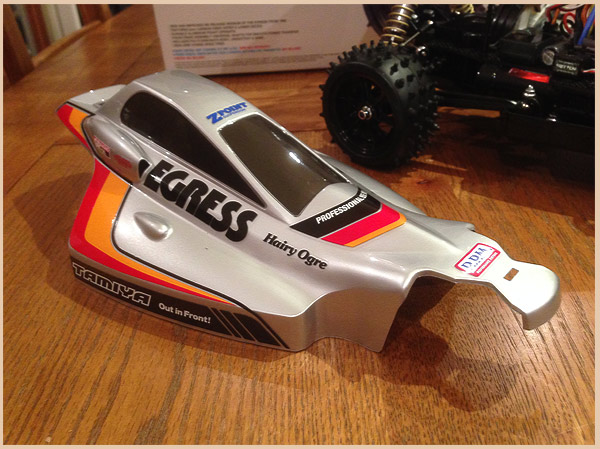
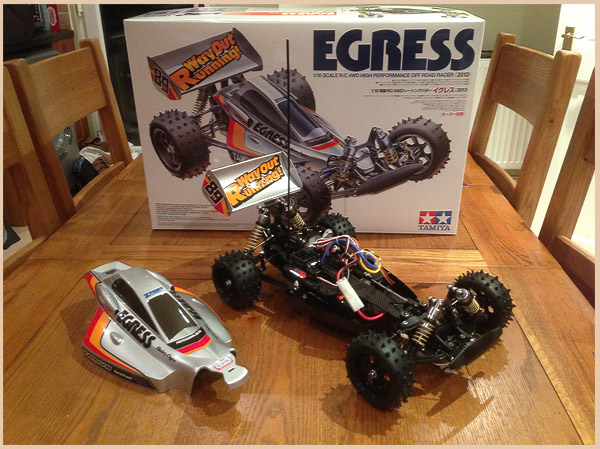
So, there you have it, the full step by step build of the 2013 re-re Tamiya Egress. Just incredible.
Stay tuned as I’m going to do a couple of videos of this over the next week or so, so that you can see it in action. Awesome!
Mike.
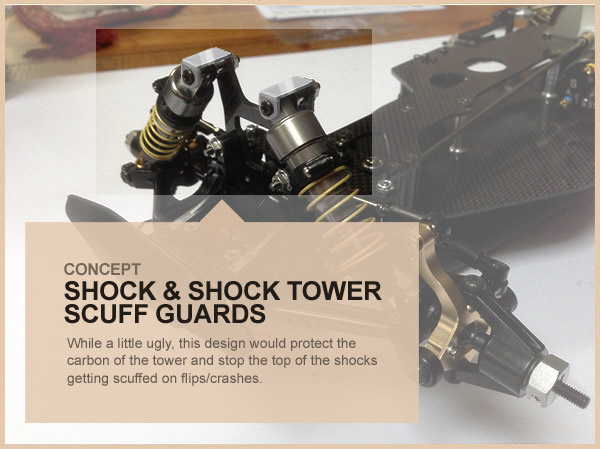
Hey Guys,
As I’m drawing ever closer to the finished car, its dawned on me how scared I am of brutalising this thing. And it dawned on me, the only part of the car that is susceptible to bad scuffs is the front shock tower and shocks. Which got me to thinking about how I could protect them. And I had a brainwave, albeit a slightly ugly brainwave.
This design screws into place without any modification (bar the need for a slightly longer screw on each mount) and would totally protect those lovely shocks and that shiny carbon. Only thing now, is how in hell do I make them? Any metal workers out there that fancy a little challenge, hit me up :)
Hey Everyone!
Ok, so time has been against me, work, life and an Xbox One and PS4 have been vying for my time ;)
Anyway, last night and my lunch break today gave a good window to chew through most of the remaining build, read on!
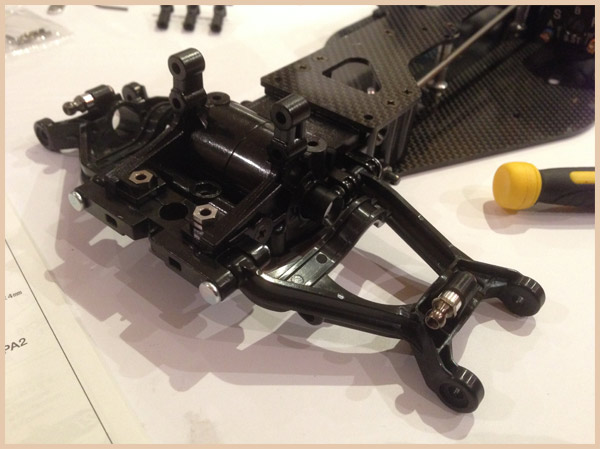
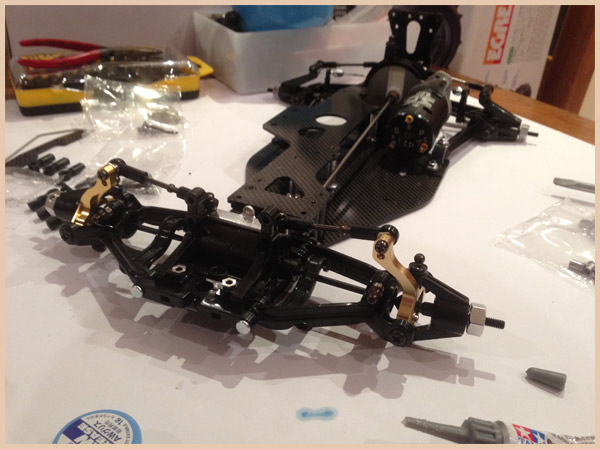
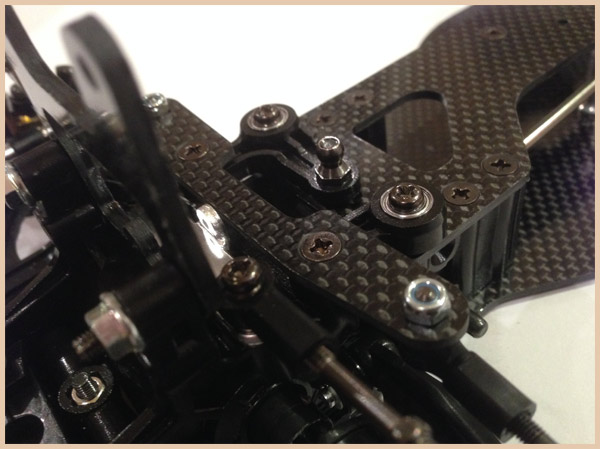
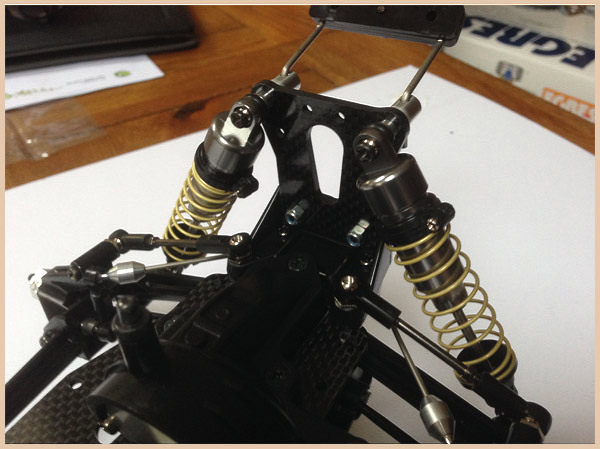
First off, the new front lower shock mount design. This is what has replaced the BF8/BF9 design, which has annoyed and pleased many folks. It was an iconic design, which is something that people feel should have stayed, but in reality, it was rather weak and this new design is super strong in comparison.
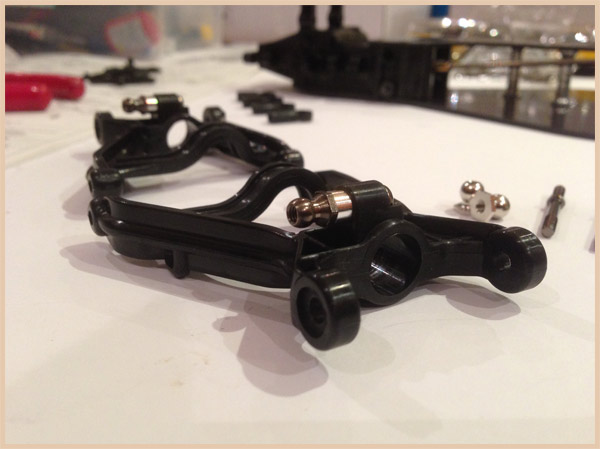
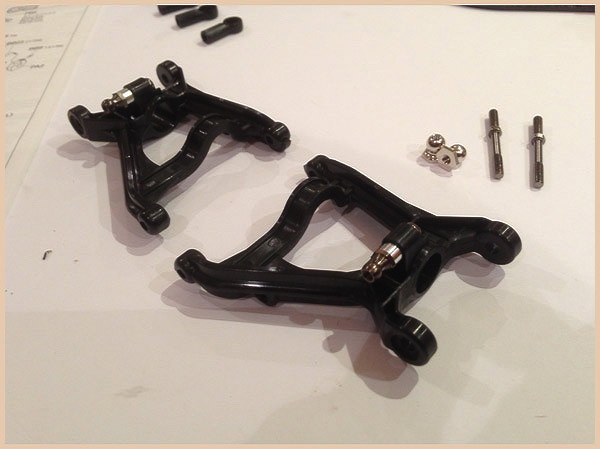
And the two wishbones fitted, nothing new to report here…move along…
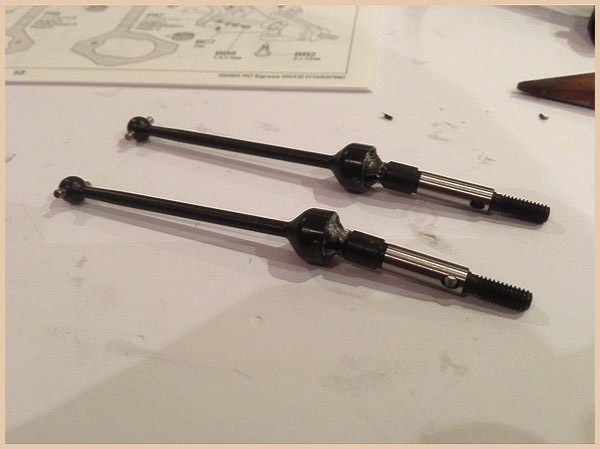
These are the new drive shafts that I forgot to photograph when building the rear end, so here are the font ones for you to look over. 100% new over the original design, but they do feel pretty sturdy. Bit of a PITA to make as they don’t come constructed, you have to build them yourself and use that horrid silver, sticky anti-wear grease. I hate that stuff ;)
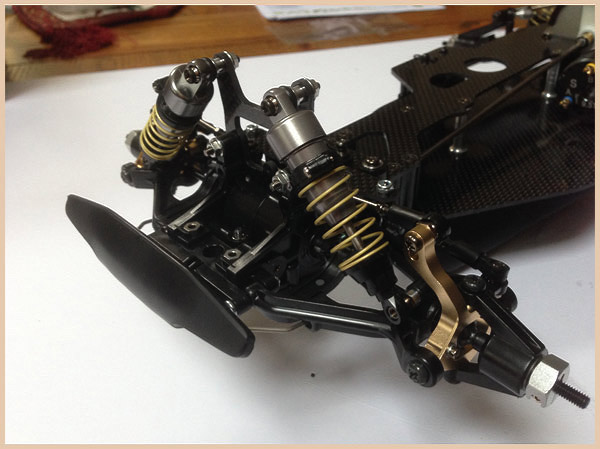
PHWOAR! Here’s the new golden bling! Don’t they look lovely! And just to note, the only thing that is original to the vintage car here is the plastic knuckles. Everything else is new pretty much.
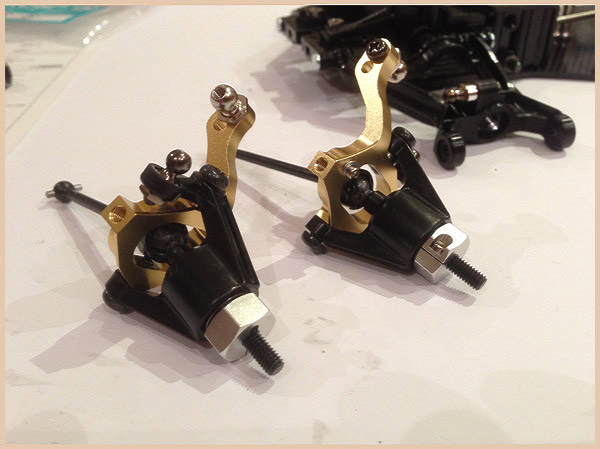
More gold porn…
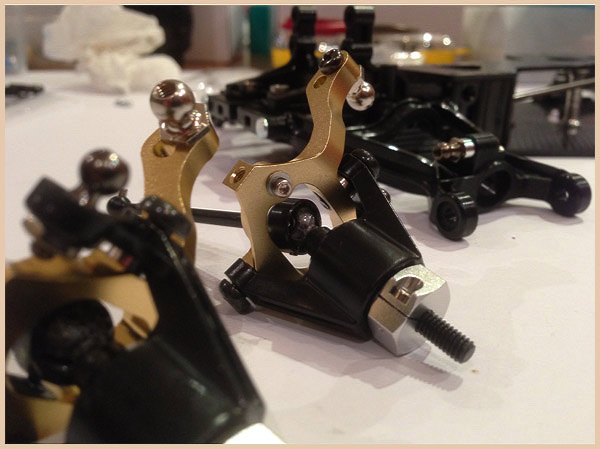
Fitted and looking loooooooooooovely.
And again…
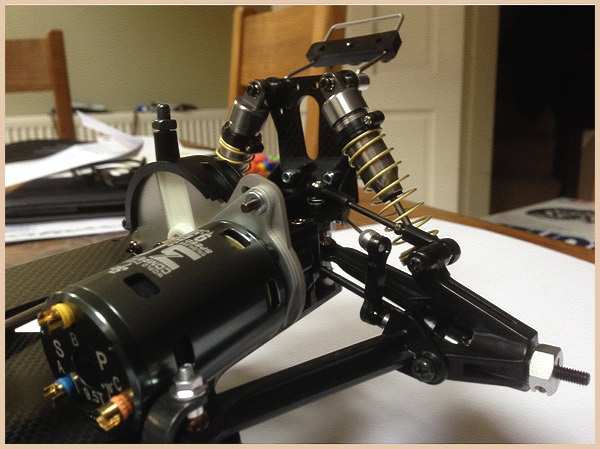
And here’s is the new front shock tower, super thick, super strong. I like this a lot!
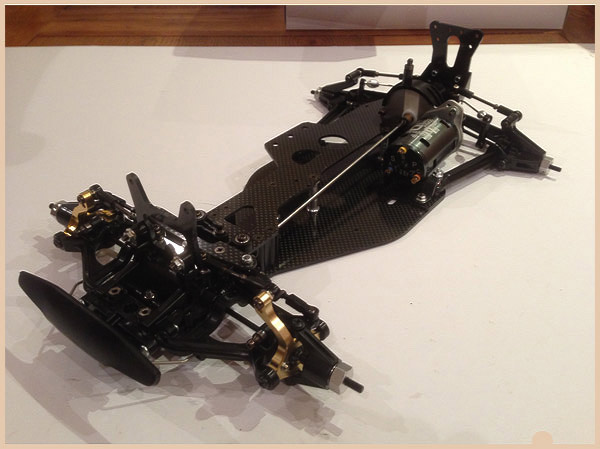
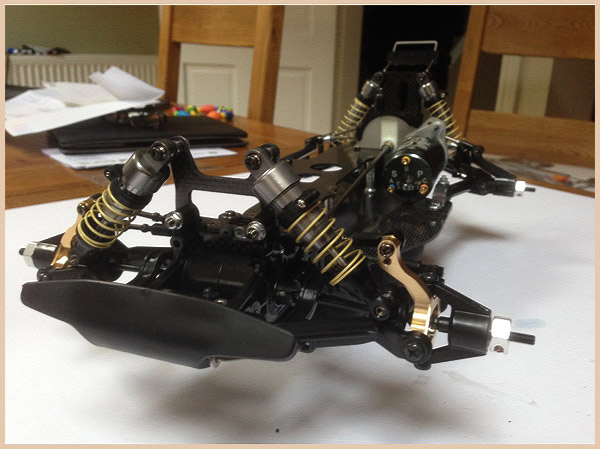
An Egress is appearing, but not as we know it!
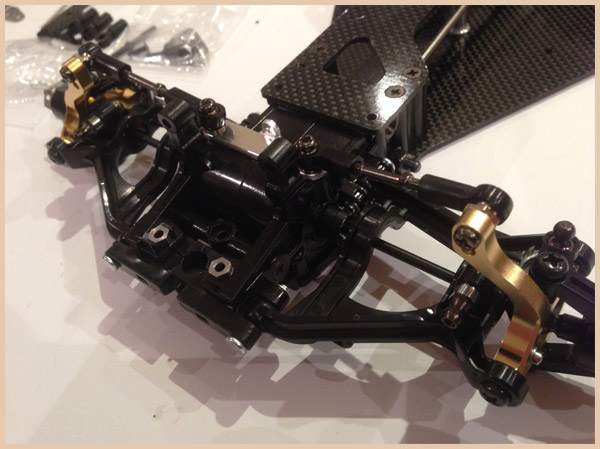
Nice new steering system built and fitted. This is very much like the original, only the materials and one screw design is different here.
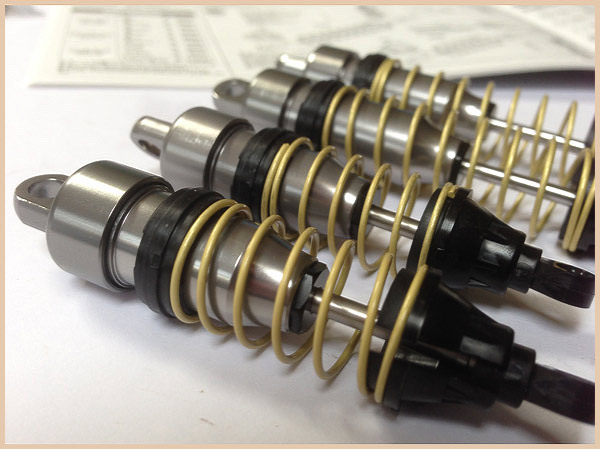
The moment I have personally been waiting for, the bloody gorgous matt gold springed shocks! These are SOOOOO stunning! Lets slap’em on this beauty!

Actually some more close up action first…
FITTED! God damn this car is looking so, so sexy! What a beaut!
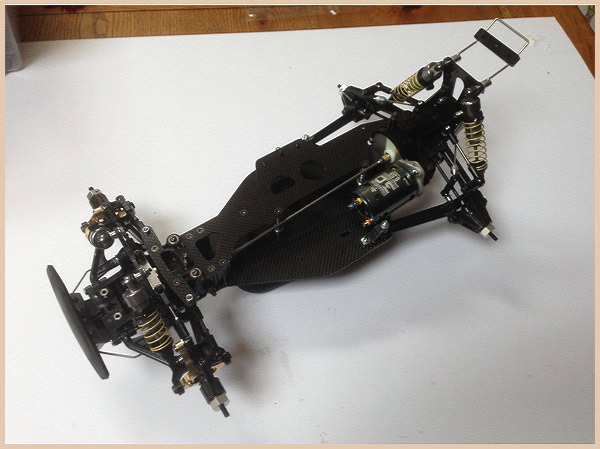
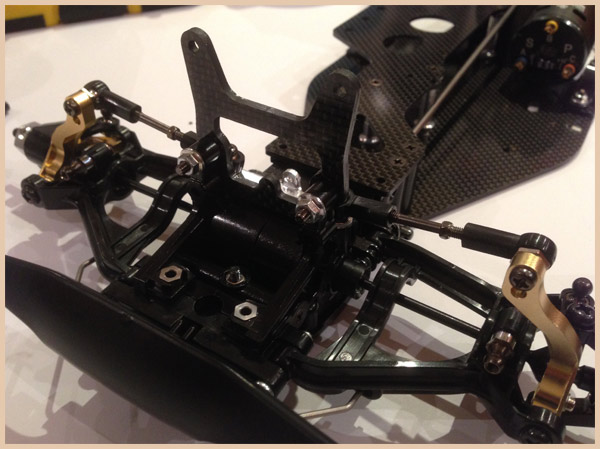
Nice close up of the front end to see all the new details…
And a close up of the rear end with the classic high lift wing mount. Iconic design!
And another…
And one more for good measure!
Next is the servo mounting, wheels, tyres and electrics installation. BRING IT ON!
Mike.

If you're looking for the Egress manual as I was when I first started on this glorious adventure, then please head over to Tamiyabase.com
All products, images, and contents on this website are the property of their respective owners
Website by Fully Illustrated